

To create a comprehensive informational blog regarding the Seeker script and its utilization in the Termux app, follow these steps:

Step 1: Install Python 3
- Open the Termux app and update the packages by running the command: apt-get update
- Install Python 3 by running the command: apt-get install -y python3
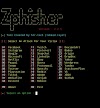
Step 2: Clone Seeker Repository
- Clone the Seeker repository from GitHub by running the command: git clone https://github.com/thewhiteh4t/seeker.git
- Move to the Seeker directory by running the command: cd seeker/
Step 3: Make the install.sh script executable
- Set the execute permission for the install.sh script by running the command: chmod +x install.sh
Step 4: Run the install.sh script
- Execute the install.sh script by running the command: ./install.sh
- This will install all the necessary dependencies for Seeker.
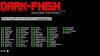
Step 5: Run Seeker
- After the installation is complete, run Seeker by running the command: python3 seeker.py
How to Use This Script:
1. Copy the entire script provided.
2. Open the terminal on your Linux System.
3. Paste to copied script into the terminal.
4. Press Enter to execute the script.
#!/bin/bash

# Install Python 3
apt-get update
apt-get install -y python3

# Clone Seeker repository
git clone https://github.com/thewhiteh4t/seeker.git
cd seeker/

# Make the install.sh script executable
chmod +x install.sh

# Run the install.sh script
./install.sh

# Run Seeker
python3 seeker.py
To use Ngrok with Seeker in Termux, follow these steps:
Step 1: Visit the Ngrok website
- Open your preferred browser and visit the Ngrok website at https://ngrok.com/download
- Proceed to the download area on the website.
Step 2: Download Ngrok for Linux
- Find the Linux section on the Ngrok website and click on the appropriate download link for your architecture (32-bit or 64-bit).
The "dpkg --print-architecture" command is utilized to showcase the architecture of the presently operating system. It will provide the architecture as either i386, amd64, armhf, arm64, or any other supported architecture.

- Wait for the download to complete.
Step 3: Install Ngrok on Termux
- Open the Termux app and open a new terminal.
- Install the wget package by running the command: apt install wget
- Download Ngrok for Termux by running the command: wget [Ngrok download link]
- Extract the downloaded file by running the command: tar xvzf ngrok-v3-stable-linux-arm64.tgz
- Set the execute permission for the Ngrok executable by running the command: chmod +x ngrok
Step 4: Configure Ngrok
- Run the command: ./ngrok config add-authtoken [your Ngrok auth token]
- Replace [your Ngrok auth token] with your actual Ngrok authentication token.

Step 5: Start Ngrok
- Connect your device to a hotspot or network with internet access.
- On your terminal, execute the command: ./ngrok http 8080
- This will start Ngrok and provide you with a public URL to access your Seeker server from anywhere.
By following these steps, you can create a full information blog about the Seeker script and provide a step-by-step guide on how to use it in the Termux app, along with integrating Ngrok for remote access.


0 Comments